DIY Hacking Chair
Years of repetitive stress injuries have led me to investigate alternative workstations. Even while using split keyboards and avoiding mice, I still experience issues in my wrists and shoulders with a conventional desk setup. Sitting on the couch looking down at a laptop screen is even worse.
In a previous blog post I shared a simple DIY supine workstation that I used while recovering from a pinched nerve. It reduces stress in the neck and shoulders and can be a boon for severe cases. However, most folks won’t need something that intense so in this entry I describe a hacking chair that could benefit a wider set of users.
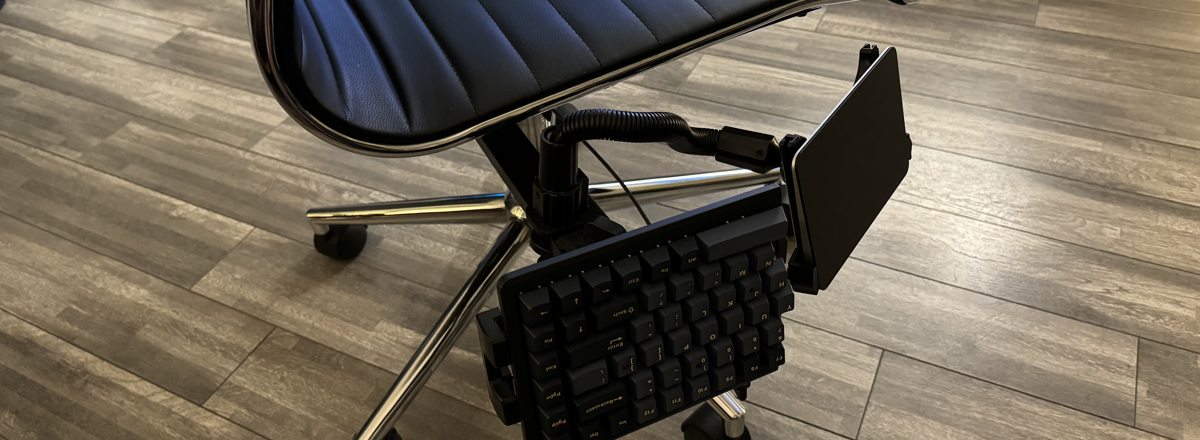
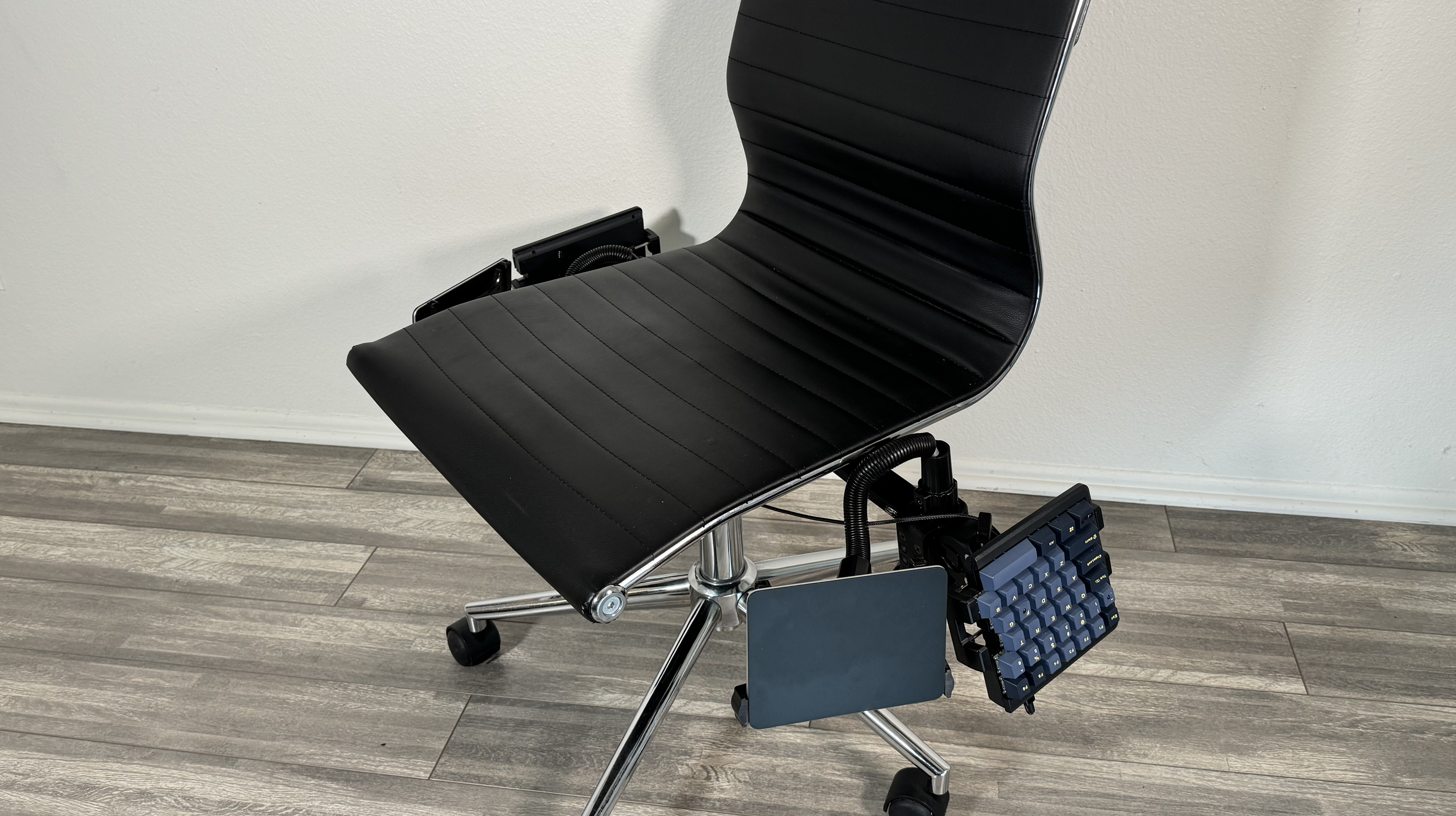
The concept is simple: instead of placing the keyboard and pointing device on the desktop, place them vertically slanted at the side of the chair so that the user’s arms maintain a comfortable resting position while typing.
An unintended benefit of this setup is the workspace mobility it allows. For example, if I’m producing music and roll the chair to use a MIDI keyboard several feet away, I can still remotely control the DAW software naturally. This has allowed the removal of several control surfaces I had cluttering my workspace.
If You Build It
To construct your own chair, you’ll need a hack saw, wood saw, drill, and wrench. Here is a list of materials:
| Item | Count | Price |
|---|---|---|
| Armless Office Chair | 1 | $250.00 |
| KDD Bike Tablet Mount | 2 | $20.00 ea |
| Arkon Heavy Duty Tablet Mount | 1 or 2 | $37.00 ea |
| Mistel MD770 Split Keyboard | 1 | $190.00 |
| Apple Magic Trackpad | 1 or 2 | $150.00 ea |
| Slat and fasteners | 1 | ~$20.00 |
| Total | $675 - $875 pre-tax |
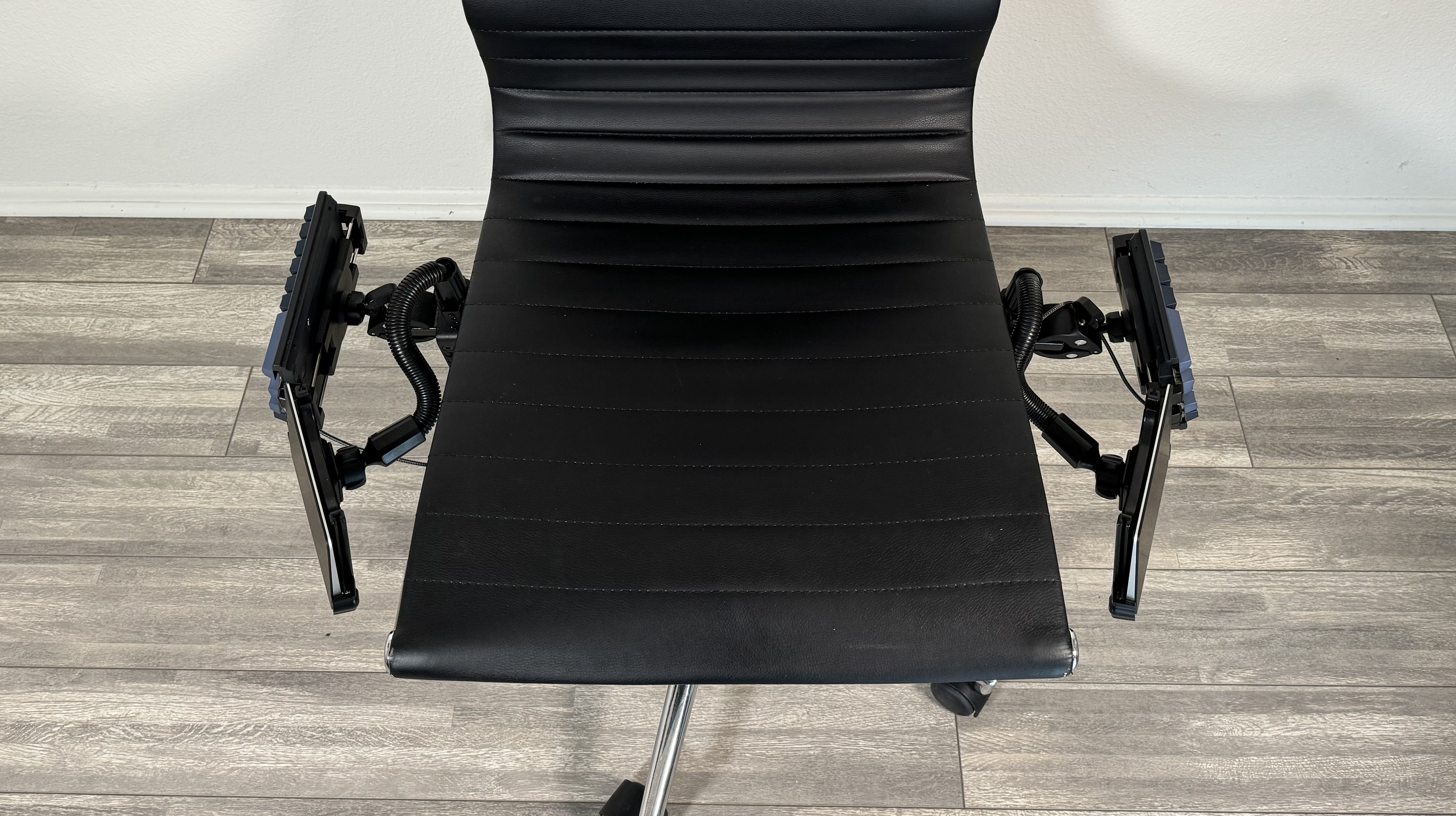
You can skip the second trackpad/mount if you don’t want the symmetrical pointing devices but I like to rest my right arm while I’m scrolling a long page with my left so I find the second pointer convenient even if it’s not in constant use.
You’ll need decent touch typing skills for this setup to be effective. If you’re peering over the side of the chair to hunt for keys frequently, you’ll find it cumbersome and retreat. First, train on a standard keyboard (there are many games that help with this), then you’ll be ready to transition to a split configuration without a hitch.
I admit that after years of touch typing on split keyboards, I still have trouble finding punctuation marks with my right pinky as well as discerning modifier keys with my left pinky. To mitigate, I place small dabs of nail polish on anchor keys as tactile reference points: L-Ctrl, ~, ], and 0. This extends the idea of reference bumps commonly found on home keys F and J.
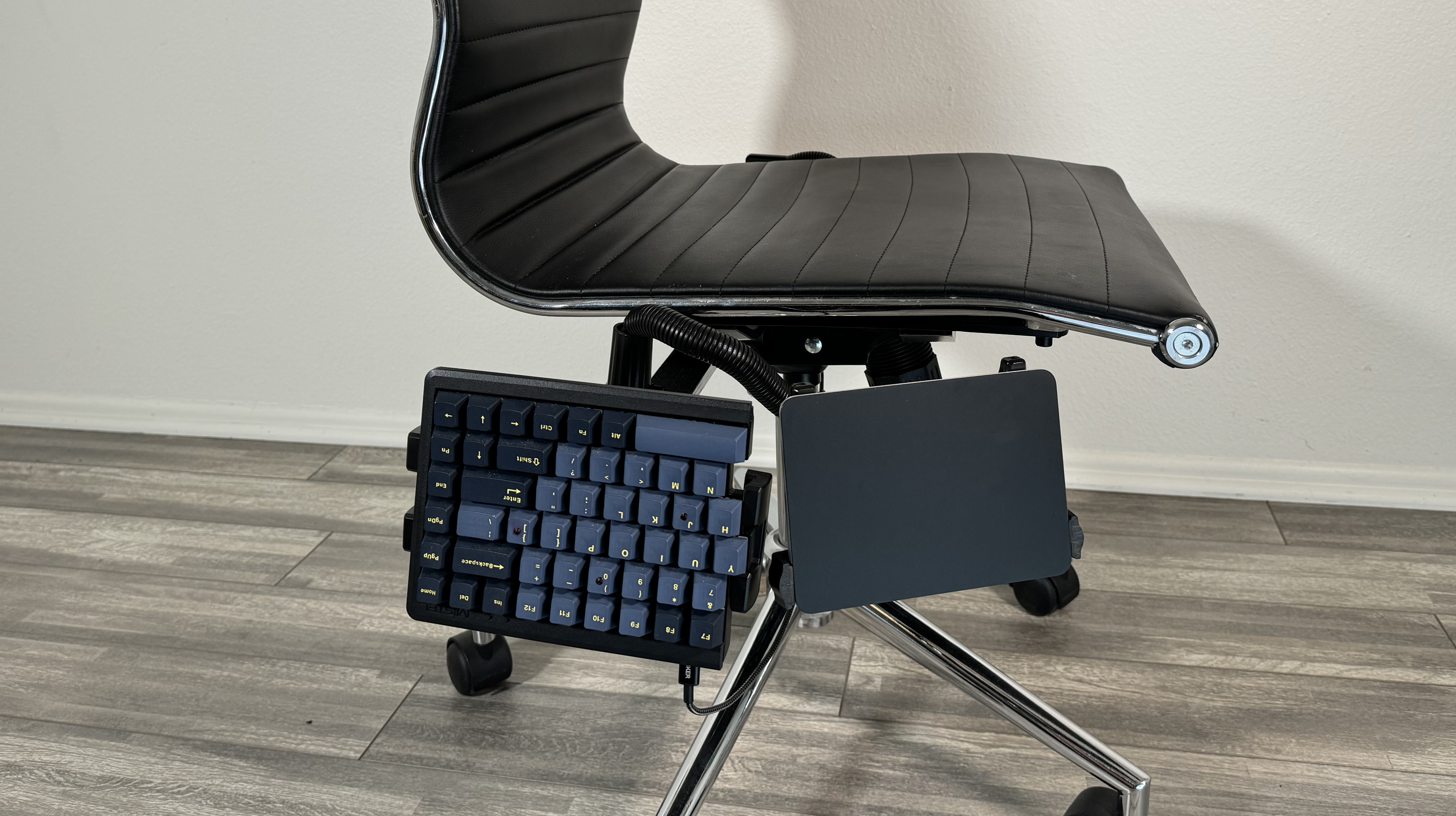
I also remap L-Space to Cmd and CapsLock to Delete, which saves precious pinky and thumb movements. The pictured split keyboard (Mistel MD770 Split Keyboard) has built-in macro programming. You can also use software like Karabiner-Elements or SharpKeys.
Here’s a brief set of instructions for assembling the chair. Specifics will vary depending on the equipment you’ve acquired.
1. Choose a Chair
Find an office chair you’re comfortable sitting in for long periods. Make sure that the arms are removable and that the undercarriage provides holes to fasten screws. You can drill your own holes with a metal drill if necessary. The Armless Office Chair shown in these pictures has a common modern design that is similar to many other models.
2. Shorten the Pneumatic Lever
If the chair has a pneumatic cylinder lever for adjusting its height, you may need to shorten it. Use a hack saw to cut off the end of the lever if it sticks out beyond the side of the seat or if it will otherwise collide with the input devices. With the pictured chair, the handle had to be removed which compromises its ability to adjust. Luckily, I keep my chair at a constant height so this is not an issue for me.
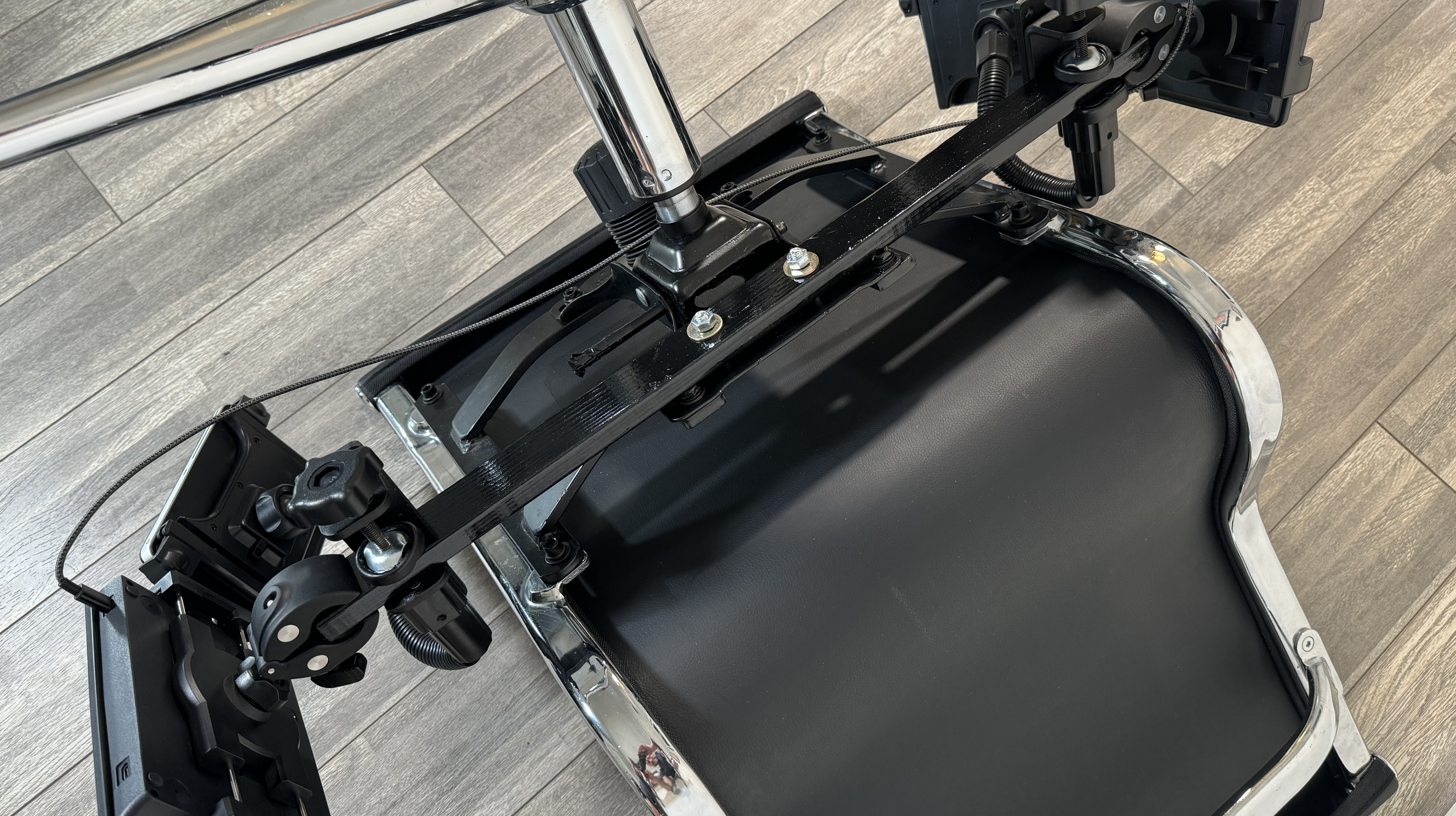
3. Mount the Slat
The wooden slat provides the attachment points for the input device mounts. It should be centered horizontally under the chair and cut to a length that is comfortable for your personal build. The chair you select will determine how you mount the slat but in general you’ll want to drill two holes in it and mount it to the undercarriage using bolts, washers, and nuts. Ensure it is secure before proceeding.
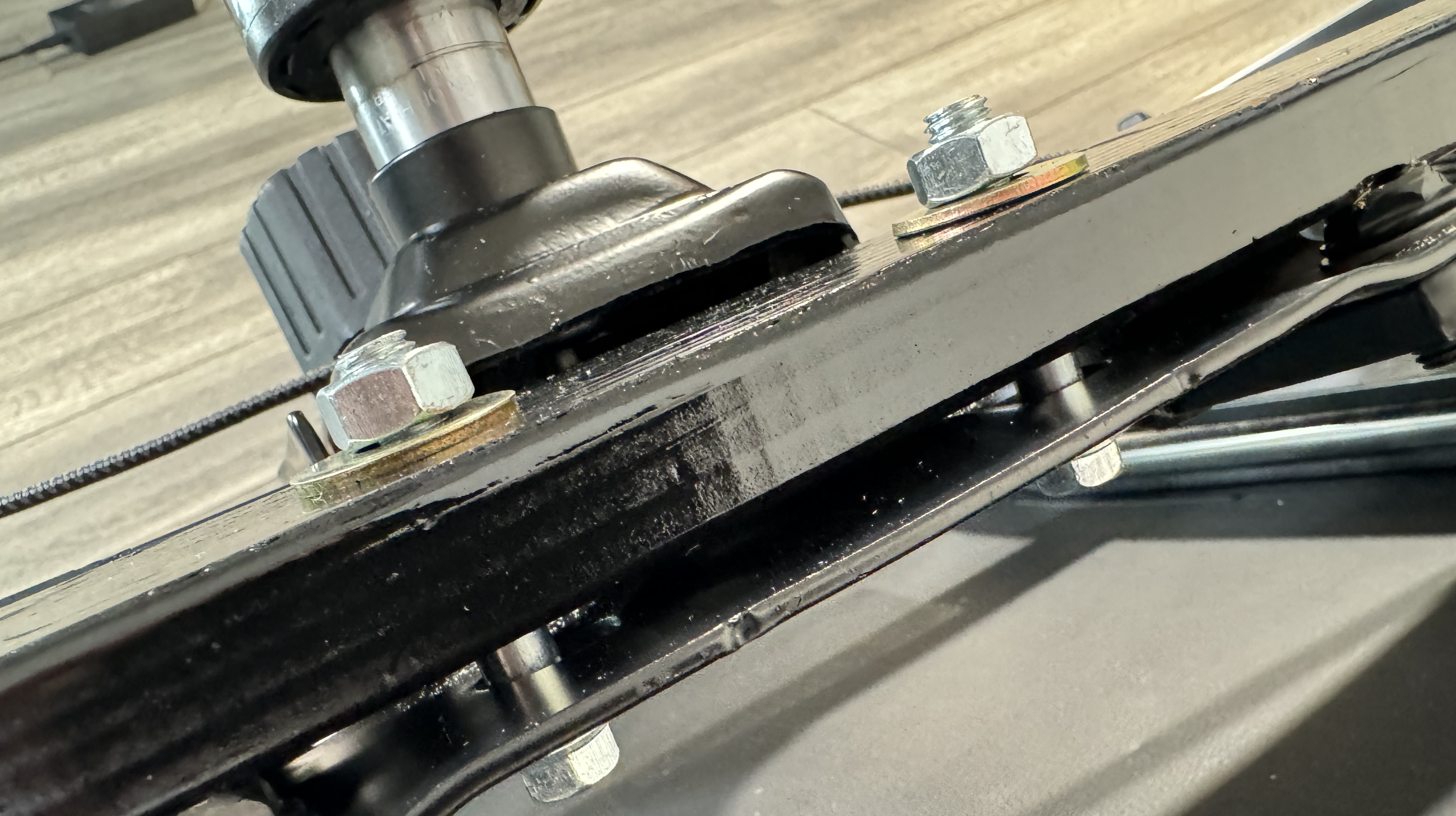
The slat pictured measures 1 3/8” x 5/8” x 24 1/2”. You may want to iterate on its exact length and placement as you get more accustomed to typing in the new position. If you find that your elbows are bent while typing, you should mount the slat lower by adding a shim. The mounts themselves provide a few inches of flexibility so after mounting the slat you can make fine adjustments on the mounts before deciding to shorten the slat further. Note the additional length the keyboard mounts add to the end of the slat while you’re considering adjustments.
I personally prefer the surface of the keys to be 7” away from the edge of the chair so that my arms are slightly spread while typing. I experimented with a shorter slat where the keys were almost under the chair but I didn’t find that vertical arm position as comfortable.
You may paint the slat to match the aesthetics of the chair or leave the natural wood look.
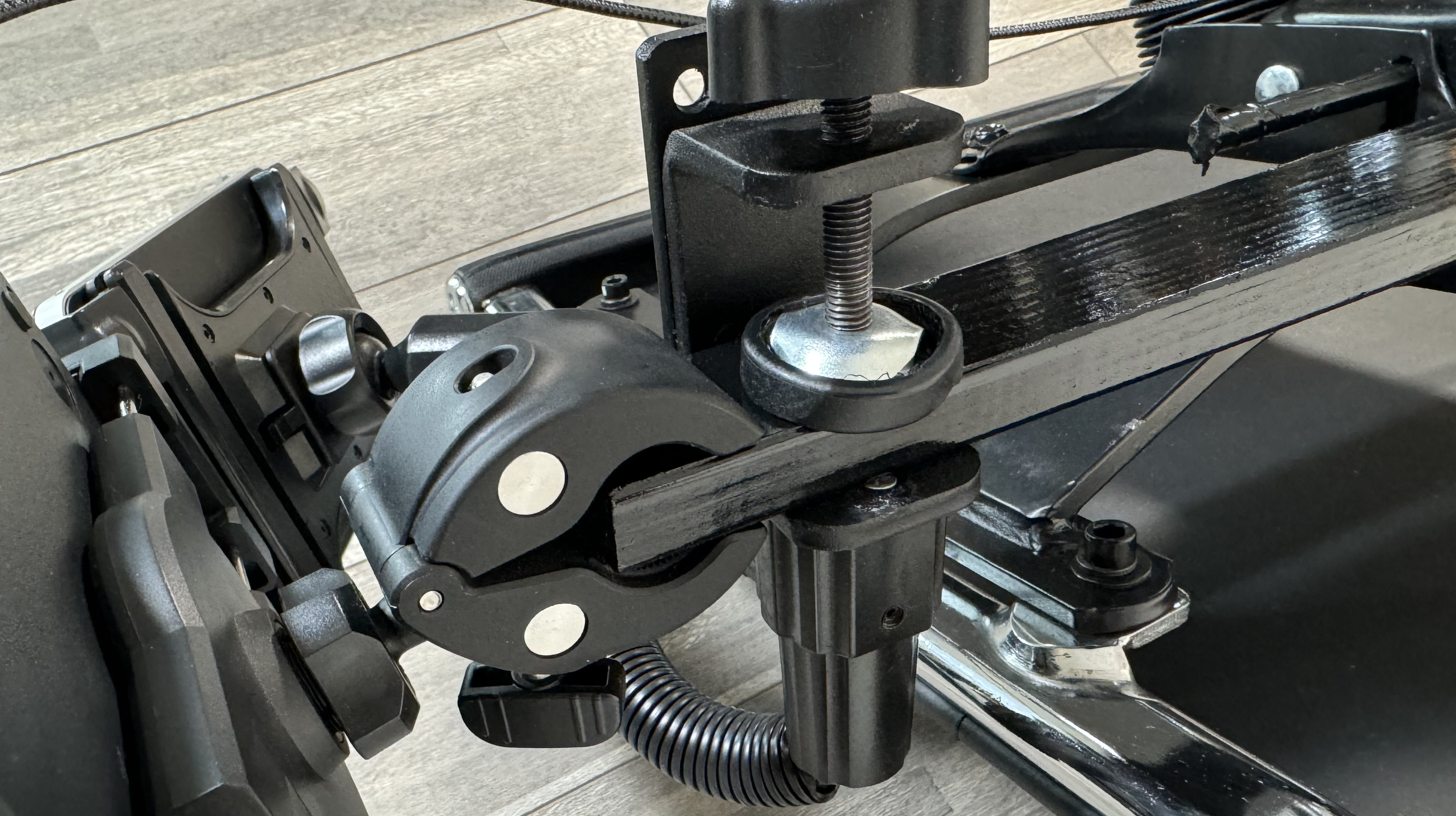
4. Attach the Device Mounts
Attach the input device mounts to the slat. See the image below for the suggested mounting positions. This configuration keeps the devices below the level of the chair but held firmly in place while still allowing easy removal of each device.
5. Attach the Devices
These input devices are wireless so they’ll require periodic charging. Being able to easily remove and reattach them is a nice practical feature of the chair and a primary reason for choosing the specific mounts mentioned here.
Attaching the devices themselves to the mounts should be pretty simple at this point. Make adjustments on the mount gimbals to find the right orientation for the devices. I prefer a slight slant but if you have larger hands you may prefer a more vertical position.
You can reduce the height of the plastic pincers that hold the trackpad(s) so they’re flush with the trackpad itself if you prefer. I used a hack saw for that.
You might need a longer USB-C cable than what’s provided with your split keyboard.
Try It!
The simple design outlined here offers an inexpensive alternative to various supine and multi-modal workstations available on the market. For those with some Do It Yourself gusto, building a hacking chair can be a fun project that also benefits longterm health. After years of experimenting with unorthodox workstation setups, I have found this configuration offers a nice tradeoff between versatility, efficacy, and simplicity. Give it a try!